Here is how to quickly add multiple Windows NT6/10 (Vista, 7, 8, 10, Server 2008/2012 etc.) sources and Ubuntu with persistence space to a USB disk.
1) If using the program for first time on this USB disk, select the auto-format option. Use FAT32 if you’d need to boot in UEFI mode.

2) Select the first NT6 source, it is expected as in ISO image file, here is an example with Windows 7 x64:


3) (Optional) In advanced options you could change folder and boot menu name, make Q-Dir File Explorer launch before start of Setup and add a folder with custom boot critical drivers to be loaded. The latter could be useful to load custom USB 3.0 drivers or SATA/AHCI/RAID ones.
For non-boot critical drivers, such as Wireless/WLan, LAN, Video or Sound drivers, a good idea is to use SAD (Stand Alone Driverpack utility), a proven and reliable solution from the DriverPacks team. More details about these options can be found in the FAQs.

4) (Optional) Add Ubuntu 14.04 Desktop with its own persistence space:


5) Press GO to start the process:

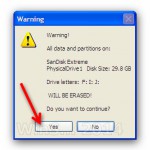
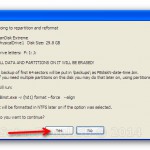
6) If the auto format option was selected, please do read carefully which disk is going to be reformatted, all data is going to be wiped out, the click OK on both dialogue boxes:


7) You can watch detailed progress of what is happening by selecting the Show Log option:

In a few minutes you will see Job Done message, the first two source have been transferred:

8) Now lets add another NT6 source, it would be Windows 8 Enterprise Eval x64, in the very same way as the first one. To preserve contents of the USB disk, make sure the auto-format option is not checked. Press GO and wait until process completes.:


9) Lets add yet another NT6 source, this time Server 2008 R2 x64, sequence is exactly as before:


10) Here is the boot menu once the system was booted from this USB disk:


11) To get persistence in Ubuntu, when the Live CD menu gets displayed hit the key to enter “Other Options”. This will display the arguments that the Live CD passes to the kernel. At the end of this argument list just add a space and add the word “persistent”. This will instruct the Live CD to maintain and use persistence.


Thanks for sharing. I read many of your blog posts, cool, your blog is very good.
Your point of view caught my eye and was very interesting. Thanks. I have a question for you.
Thanks for sharing. I read many of your blog posts, cool, your blog is very good.
Your point of view caught my eye and was very interesting. Thanks. I have a question for you.
Your point of view caught my eye and was very interesting. Thanks. I have a question for you.
Your point of view caught my eye and was very interesting. Thanks. I have a question for you.
Thanks for sharing. I read many of your blog posts, cool, your blog is very good.
Your point of view caught my eye and was very interesting. Thanks. I have a question for you.
Your point of view caught my eye and was very interesting. Thanks. I have a question for you.
Thanks for sharing. I read many of your blog posts, cool, your blog is very good.